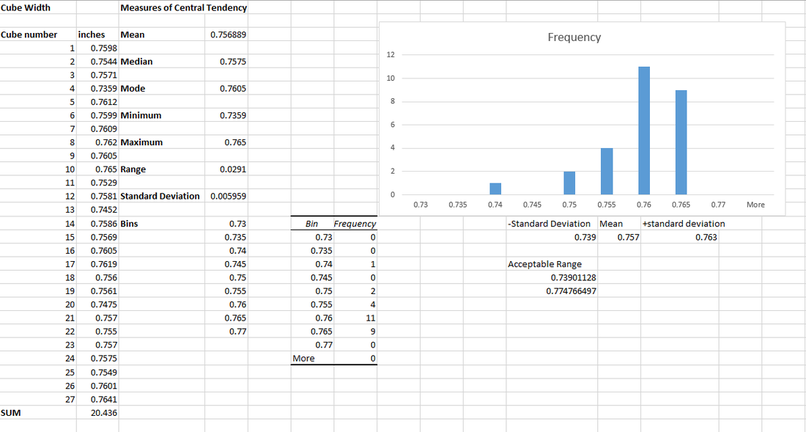
I measured all of these cubes with a dial caliper so that I could get the most precise measurements of all 27 of the cubes. I found all of the measurements because then I saw what cubes would be able to fit together and what cubes I would have to replace. Then I found the acceptable range which is plus and minus three standard deviations from the mean of the histogram.
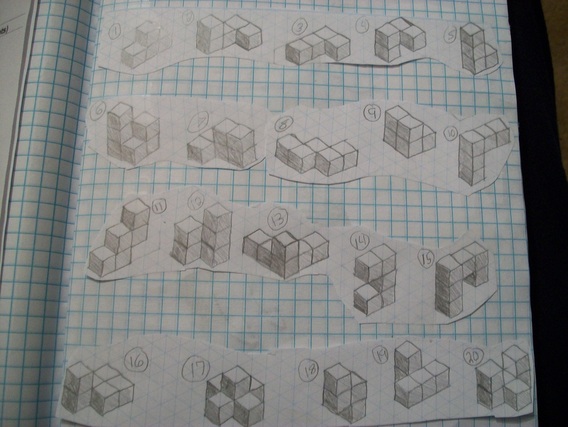
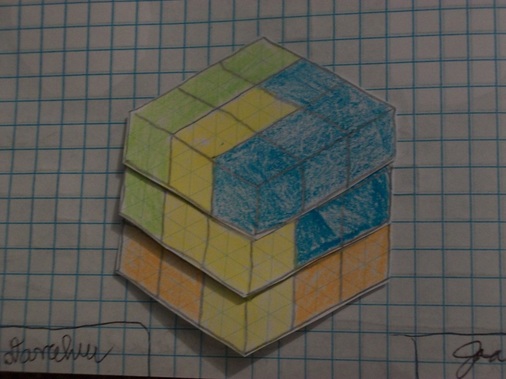
These sketches are drawn in isometric format to show the best angled view of all of the pieces. I drew all of these ideas for brainstorming so that I would have a idea of different parts that I could use.
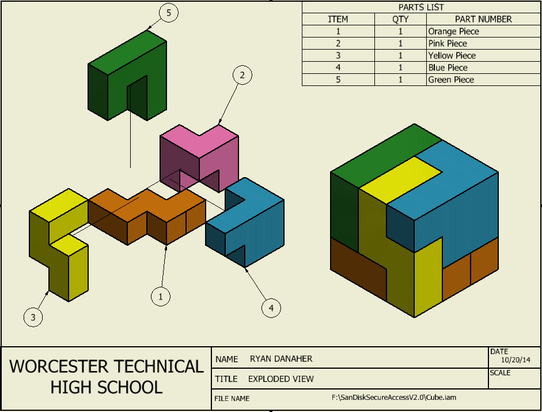
Degrees of freedom are the degrees at which the parts of the cube are able to move. I had to take away all of these degrees of freedoms on the Autodesk Inventor. I was able to do that by connecting all of the pieces together so that none of them were able to move and then I had to ground the piece that I started with. So that there were no degrees of freedom left.
attempts at solving my cube
Mom- Did not solve in the 5 minute time
Dad- Did not solve in the 5 minute time
Sister- Did not solve it in the 5 minute time
Liam Deck- Did not solve in the 5 minute time
Nathan Ewell- Solved it in 2 minutes 58 seconds
Dad- Did not solve in the 5 minute time
Sister- Did not solve it in the 5 minute time
Liam Deck- Did not solve in the 5 minute time
Nathan Ewell- Solved it in 2 minutes 58 seconds
Reflection
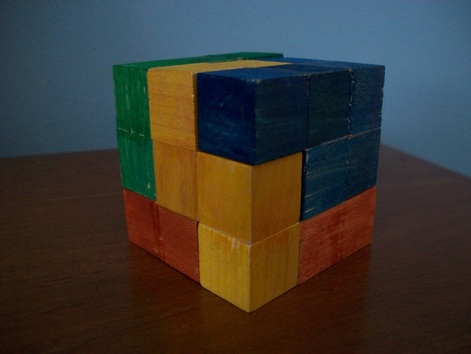
This puzzle cube project was a fun and challenging experience. I had to start with just picking out 27 different little wooden cubes. They were all supposed to be 3/4", but all of them were different sizes. So I had to create a table and measure all 27 of the cubes with a dial caliper. I used a dial caliper to get the most precise measurements. Then I had to find the measures of central tendency using that set of data. After that I made a histogram and found the standard deviation and acceptable ranges. After I was finished with all of the statistics of the data, I had to use Autodesk Inventor to model my cube pieces. I have become a lot more efficient with Inventor after using it for this project. We had to use it for modeling the pieces, making technical drawings, animating the cube explosion and put all of the cube parts together to make one final puzzle cube. Using the design process for this project really did help guide me on completing the task at hand. I was able to brainstorm ideas and that helped me figure out what pieces to actually use. Then I was able to construct my cube better with the technical drawings that I had drawn of all the pieces. Now that I can look back on the whole project, there really is not anything that I would change about my cube because it is hard and challenging as it is.
